: Which AI Writing Tool Is Better for Businesses?")


Ontraport CRM Setup Tutorial
Introduction
Most CRMs are complex and time-consuming, leaving you overwhelmed. In reality, you need a system that feels simple and gets you selling fast. In this Ontraport CRM setup tutorial, you’ll see how Ontraport cuts through the clutter. You’ll learn how to turn on a full-featured CRM with marketing automation in minutes, not days. By the end, you’ll have a basic setup for client management, lead nurturing, and sales automation – and it won’t take more than 15 minutes to get started.
Imagine: instead of wrestling with complicated software, you click a few buttons and Ontraport organizes your contacts, sets up a sales pipeline, and starts sending emails. This tutorial shows you step-by-step how to achieve that. Even if you’re not a tech expert, you’ll find the process clear and straightforward. This Ontraport CRM setup tutorial breaks it down into easy steps, so you can follow along without getting lost.
If you want to follow this guide step-by-step inside your own account, you can start your free Ontraport demo here.
By the way, If you want a broader view of the landscape, I’ve also put together a complete 2026 guide to digital tools covering AI, CRM, productivity platforms, automation tools and more.
What Is Ontraport and Why Use It
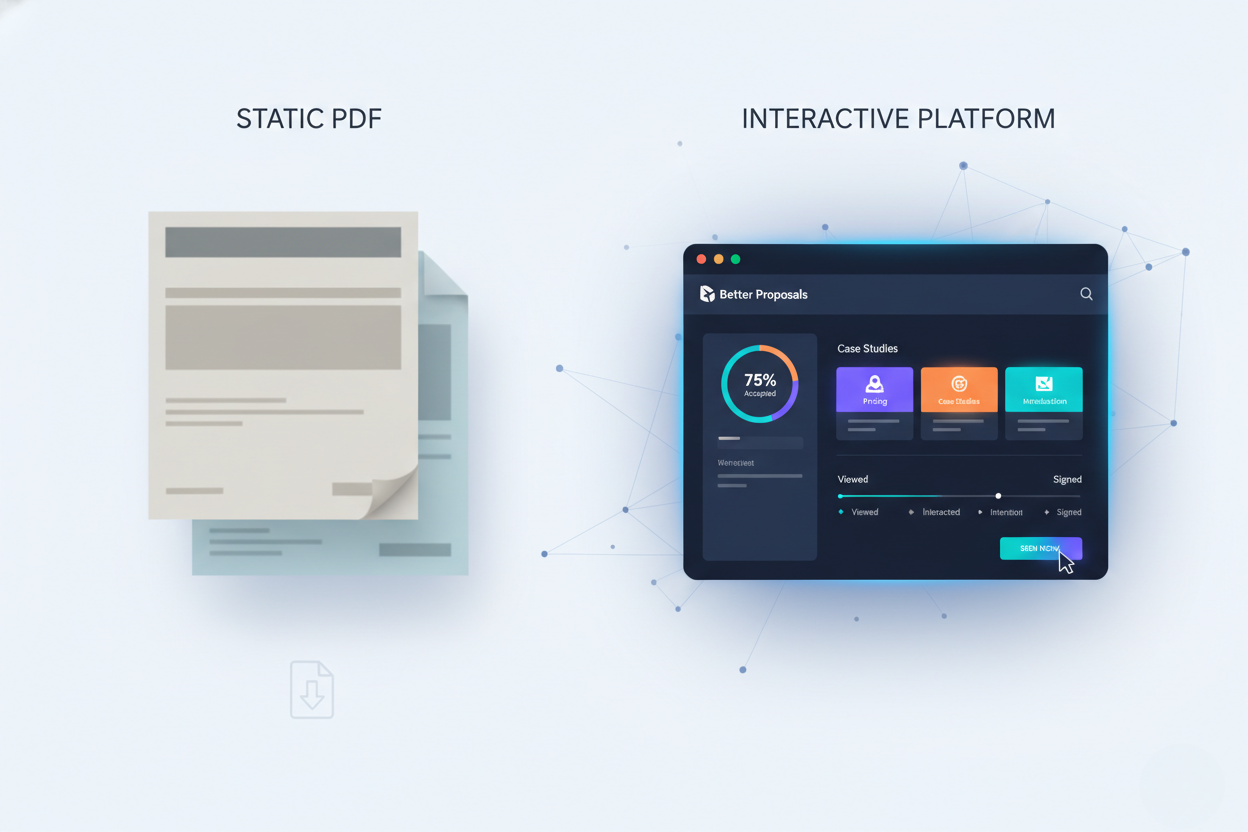
Ontraport is an all-in-one business platform made for busy entrepreneurs. It combines a CRM (Customer Relationship Management), email marketing, and automation tools into one package. You don’t have to juggle multiple apps. With Ontraport, your contact data, sales pipelines, emails, and even web forms live under one roof.
Why choose Ontraport? It was built with small businesses, coaches, and consultants in mind. You get powerful features like a visual automation builder and ready-made campaign templates without the usual complexity. You can tag and segment your clients and leads however you like, so you send the right message at the right time. Ontraport also has intuitive pipeline tracking: you can see at a glance which stage each potential sale is in.
Unlike many CRM systems, Ontraport is designed to be easy to learn. Its user-friendly interface means you can do things visually and drag-and-drop. There’s no need for coding or hiring a consultant. At the same time, it’s packed with advanced tools (like tracking visitors, detailed analytics, and built-in reporting dashboards) you can grow into later. In short, Ontraport simplifies client management, lead nurturing, and sales automation all in one place.
In the step-by-step Ontraport CRM setup tutorial below, you’ll see how to put these features to work for your business.
Step-by-Step Ontraport CRM setup tutorial
Next, let’s continue the Ontraport CRM setup tutorial by adding your contacts and building your pipeline.
1. Creating an Account
- Sign up for Ontraport: Go to the Ontraport website and click Start free trial (or similar signup button). Fill out your business email, name, and basic info. Ontraport usually offers a 14-day trial.
- Choose your plan: You might get a chance to pick a plan, or just start with the trial and pick a plan later. For now, focus on getting the account.
- Verify your email: You’ll likely receive a confirmation email. Click the link to activate your account.
- Set up your business profile: Once you log in, Ontraport may ask for company information (like name, address, website). This ensures emails and invoices display correctly. Enter simple details about your business.
- Tour the Dashboard: Ontraport may offer an introductory tour or setup wizard. Feel free to skip it, but know that it points you to key areas (Contacts, Campaigns, Forms, etc.). You can follow it now or later as you like.
To set up your system as shown, begin with a free account – open your Ontraport demo here.
2. Setting Up Contacts and Pipelines
- Import or add contacts: Click on Contacts. If you already have a list of clients or leads (like in a spreadsheet), use the Import function to bring them in. Otherwise, you can manually add a contact with minimal info (name and email, for example). Ontraport lets you customize the fields (like phone, address) later.
- Organize contacts with tags or groups: As you import or add contacts, you can tag them or add them to groups. For example, tag contacts as “Lead”, “Client”, or based on interest. These tags help you filter lists and trigger automations later.
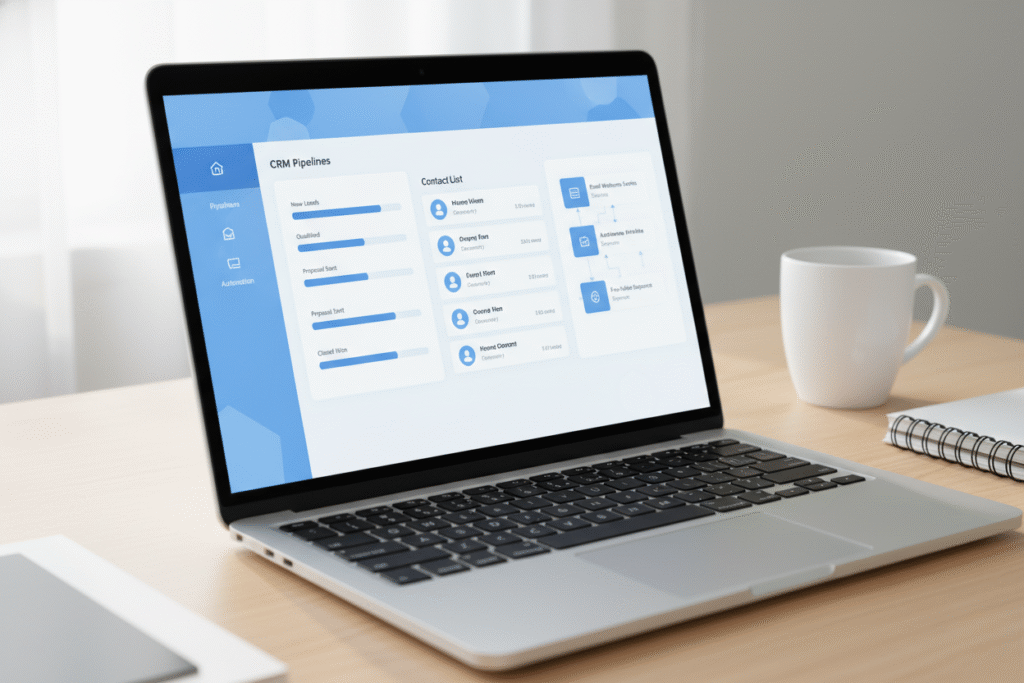
- Set up your sales pipeline: Ontraport offers a visual pipeline (sometimes called Opportunity or Deals pipeline). Go to Sales > Pipelines (or Opportunities, depending on your version). Create a new pipeline and name it (e.g. “Client Pipeline”).
- Add stages: Define the stages of your sales process. For a simple pipeline, use stages like New Lead, Contacted, Proposal Sent, Closed. Drag or add these stages into your pipeline board. Now you have a basic structure to move deals.
- Move contacts into the pipeline: With your pipeline in place, you can start moving contacts into it. If you have existing contacts, open a contact record and assign them to a pipeline stage (e.g. move John Doe to New Lead). This shows where each contact stands in your sales process.
3. Configuring Automations and Email Templates
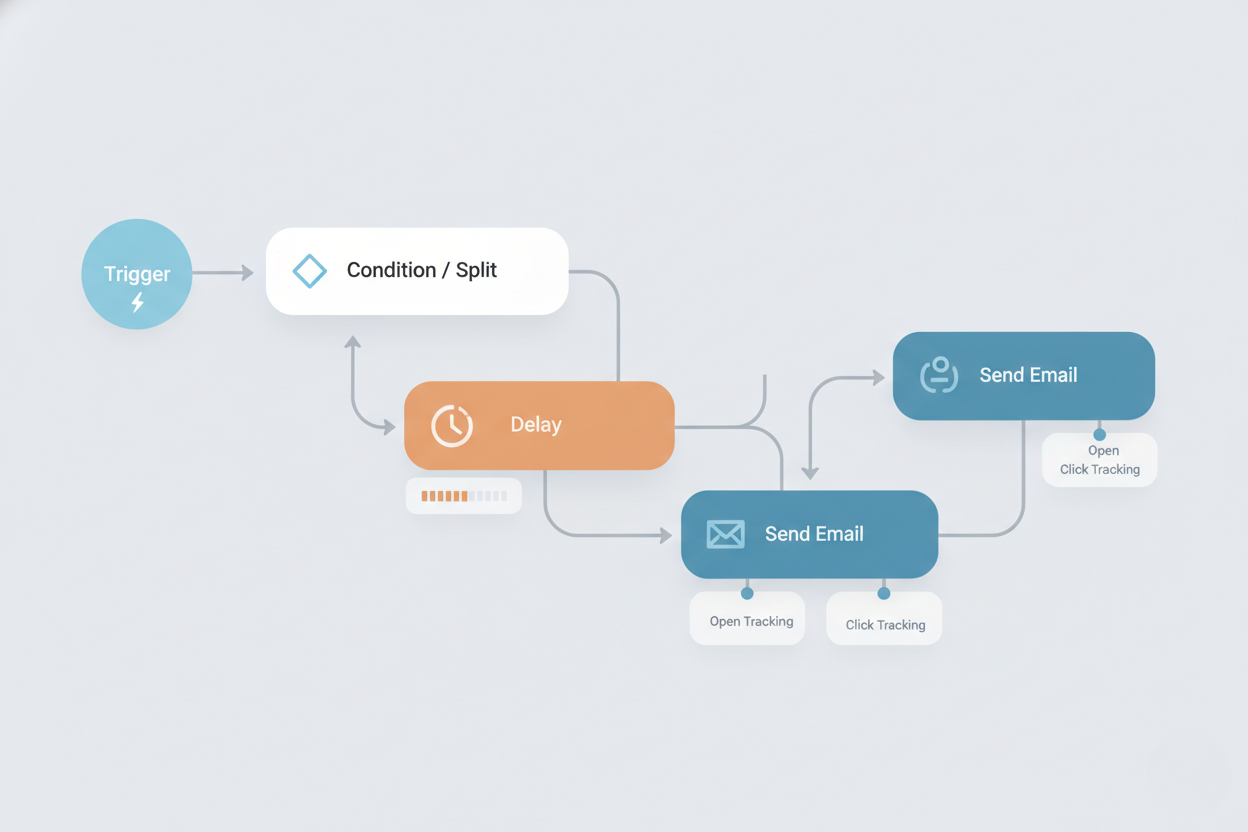
- Choose an automation tool: In Ontraport, look for the Campaigns or Automation section. This is where you build “if/then” workflows. A simple way to start: click + New Campaign.
- Set up a trigger: Every automation needs a starting event. For example, use “when a contact is tagged” or “when a form is submitted.” If you added a tag like “New Lead” earlier, choose “Contact tag is added: New Lead” as the trigger. This means when you tag someone new, the automation kicks off.
- Add actions (Send Email): Once the trigger is set, add a step: Send an Email. Ontraport will let you choose or create an email. Pick one of Ontraport’s email templates or start from scratch. Keep it simple: maybe a welcome or follow-up message introducing your services.
If you’d like to test this automation flow inside your own workspace, you can activate a free Ontraport demo here.
- Set delays and additional steps: You can space out messages by adding a Delay (like wait 2 days) and then another action (like send a second email). You might also update a tag (e.g. tag them “Contacted”) or move them to the next pipeline stage.
- Publish the automation: When your sequence is ready, click Publish or Activate (wording may vary). This makes the workflow live. Now, anytime a contact meets your trigger condition, Ontraport will automatically send the emails and update their record.
4. Connecting Forms and Tracking Leads
- Create a lead capture form: Ontraport lets you build forms or pages. Go to Web > Landing Pages & Forms (or similar). Choose Create Form and pick a template or blank. Add fields like Name and Email. At minimum, collect contact info so you can follow up.
- Set form actions: Configure the form to add contacts to Ontraport when they submit. You might assign a tag (like “Form Signup”) or add them to an automation you built. This way, when someone submits the form, Ontraport knows what to do next (like send a welcome email).
- Embed or share the form: Once the form is ready, Ontraport gives you a shareable link or HTML embed code. You can paste this code into your website or email. If you have a WordPress or other site, just insert the Ontraport form code into a page. When visitors fill it out, they become contacts in your Ontraport CRM automatically.
- Enable site tracking (optional): For advanced insights, Ontraport has a tracking script you can install on your website. This tracks which pages contacts visit. If you want, copy the Ontraport tracking code into your site header. Even without it, your basic lead capture form will get contacts into the system.
To try these forms and automations yourself, simply launch your Ontraport demo account here.
5. Testing Your Workflow
- Add a test contact: To see your setup in action, create a dummy contact or use your own email. If you used a form, fill it out as a test. If your automation trigger was a tag, manually tag a contact (maybe yourself) to match the trigger (like tagging yourself “New Lead”).
- Verify emails send: Check your inbox. The test contact should receive the automated email(s) you configured. If nothing arrives, go back to your automation and make sure it’s published and the trigger condition is correct.
- Move the deal through stages: In the pipeline board, drag your test contact’s deal card to the next stage (e.g., from New Lead to Proposal Sent). See that the change is saved on the contact’s profile. This confirms the pipeline is working.
- Check contact record updates: Open the contact’s record and ensure tags, notes, or custom fields updated as expected. If you set a tag or status change as part of automation, the test record should reflect those changes.
- Iterate if needed: If something didn’t work, adjust the settings. Maybe the automation needed a slight tweak or the form wasn’t linked properly. Then test again. Once your test contact flows through smoothly, your CRM is working correctly.

Optimization Tips
Once you’ve completed the Ontraport CRM setup tutorial above, use these tips to optimize your CRM: – Refine your automations: After your workflow is live, watch how contacts move through it. If many get stuck or drop off, tweak the steps. Add extra follow-up emails for those who didn’t open the first one, or use conditional waits (e.g. “Wait until opened email” before the next step). Make sure you publish updates after any change. – Segment your contacts: Use Ontraport’s tags and custom fields to create segments. For example, you could tag contacts by source (Facebook, Referral) or by interest (e.g. “Yoga Class”, “Consulting”). Then you can send targeted campaigns (like a special offer for each group) instead of one-size-fits-all. Good segmentation keeps leads engaged. – Use personalization: In emails and messages, include personal details (like the contact’s first name or company) using dynamic fields. Personalized messages see much higher response. Ontraport lets you pull data from contact records automatically. – Set up reporting: Ontraport has built-in dashboards and campaign reports. Check them regularly to see open rates, conversion rates, and how your pipelines are performing. You might discover that a particular email isn’t converting and needs a better subject line, or a pipeline stage has too many stuck leads. – Test A/B variations: If you send emails frequently, try A/B testing different subject lines or email content. Ontraport can send half your list one version and half another. Use the winner to improve your campaigns. – Automate internal tasks: Beyond external emails, use Ontraport to automate team tasks. For example, when a deal is closed, create a task or SMS alert for your team member. Automating follow-up reminders or notifications ensures nothing falls through the cracks. – Clean and maintain your data: Regularly remove duplicates and outdated contacts. Keep your fields and tags organized and named clearly. Clean data means your automations run smoothly and your reports are accurate.
Common Mistakes
- Skipping planning your pipeline: A common pitfall is not defining your sales stages or tags before adding contacts. Without a plan, leads pile up in chaos. Avoid this by mapping out your pipeline stages (e.g. New, Contacted, Converted) and deciding which tags or fields you’ll use. A quick outline saves headaches later.
- Not testing automations: Sometimes a sequence is built but never published or tested, so it silently does nothing. Avoid this by running through each trigger with a test contact. Send a test form submission or apply a tag yourself, and confirm the emails and actions actually fire.
- Messy contact data: Beginners often import contacts with duplicates or inconsistent tags (e.g. “lead” vs “Lead”), making filters unreliable. Avoid this by cleaning your list first: remove duplicates, use consistent tag names, and ensure each contact has basic info like email and name.
If this workflow matches your business needs, you can start your Ontraport demo here and follow the steps live.
Conclusion
Setting up a full CRM in Ontraport really can be fast and straightforward. You’ve seen how to create an account, import your contacts, build a simple sales pipeline, and wire up basic automations – all without technical headaches. Ontraport handles the busy work (automated emails, lead tracking, reports) so you can focus on your clients.
Now it’s your turn. With this Ontraport CRM setup tutorial, you have a clear blueprint to launch your CRM in minutes, not months. For busy entrepreneurs and solopreneurs, that means more time for selling and serving customers. Get a Free Ontraport Demo and build your CRM today.
want to read more about Ontraport ? Ontraport Review 2026: Powerful CRM & Marketing Automation for Growing Businesses