: Which AI Writing Tool Is Better for Businesses?")


SalesNexus Tutorial: How to Set Up SalesNexus CRM
Introduction
Setting up a Customer Relationship Management (CRM) system is a critical step for any small business or sales team that wants to stay organized and efficient. A well-configured CRM helps you track leads, manage contacts, monitor deals in progress, and automate repetitive tasks. This SalesNexus tutorial will make it easy to configure your SalesNexus CRM right from the start. In this guide, we promise to walk you through every step from account creation and contact import to building your sales pipeline, configuring email automation, and tracking performance metrics. For instance, every step we outline is part of this SalesNexus tutorial, designed to give you hands-on experience with setting up your system. In every section of this SalesNexus tutorial, examples will illustrate how features apply in a real sales scenario. This step-by-step format ensures that readers can follow along and not miss any critical setup. This progressive SalesNexus tutorial approach ensures no critical detail is missed. By the end of this SalesNexus tutorial, you’ll be ready to move forward confidently.
👉 Ready to start with SalesNexus? Click here to create your account and follow the steps in this SalesNexus tutorial.
CRM setup matters because a properly organized system can turn disorganized contact lists into actionable sales opportunities. A solid setup ensures your team can follow up with leads promptly, avoid data duplication, and use automated reminders so nothing falls through the cracks. In this SalesNexus tutorial, we will cover everything a new user needs, from initial account creation to advanced best practices for ongoing success. This article is based on industry knowledge and professional experience, without listing external sources.
By the way, If you want a broader view of the landscape, I’ve also put together a complete 2026 guide to digital tools covering AI, CRM, productivity platforms, automation tools and more.
What Is SalesNexus? (SalesNexus Tutorial Overview)
SalesNexus is an all-in-one cloud-based CRM and sales automation platform designed for small and medium-sized businesses. Created by salespeople for sales teams, SalesNexus combines contact management, email marketing, and lead generation tools in one platform. In this SalesNexus tutorial overview, we highlight the key benefits and problems that SalesNexus solves for growing businesses. For users reading this SalesNexus tutorial, it’s helpful to know why SalesNexus is different. In this SalesNexus tutorial, we also highlight real-life examples of how companies use these features.
Key benefits: Small business owners and sales managers will appreciate that SalesNexus makes sales and marketing tasks more efficient. For example, SalesNexus offers:
- Unlimited contacts: Add as many contacts as you need without extra fees, ensuring your database can grow with your business.
- Integrated email marketing: You can create email campaigns and drip sequences directly within the CRM, so your outreach is automated and tracked (no need to switch between separate email tools).
- Lead automation: SalesNexus helps automate follow-ups and lead nurturing, so no prospect slips through the cracks.
- Sales pipeline management: Use customizable pipelines to track opportunities and deals at every stage, keeping your team focused on winning business.
- Affordable pricing: Plans start around $45 per user per month (with a free trial or entry-level plan for teams that are just getting started).
These features solve common CRM challenges. Many businesses struggle with scattered data and manual follow-up. SalesNexus centralizes customer data, making it easy to segment contacts by tags, groups, or lead stage. It also uses automation rules to remind your team when to follow up. In this SalesNexus tutorial section, we emphasize how using an integrated system like SalesNexus reduces manual work and brings consistency to your sales process. For example, one goal of this SalesNexus tutorial is to clarify how SalesNexus solves specific pain points.
Getting Started: Creating Your SalesNexus Account (SalesNexus Tutorial)
👉 Start your SalesNexus setup here and follow along with this SalesNexus tutorial step-by-step.
To begin using SalesNexus, you must create an account. Follow these steps in our SalesNexus tutorial style guide to set up your new account correctly: To keep things simple, this SalesNexus tutorial lists clear steps with practical notes.
- Sign Up for SalesNexus: Visit the SalesNexus website (salesnexus.com) and look for a “Start Free Trial” or “Sign Up” button. Click it to open the account creation form.
- Fill in Your Details: Enter your name, business email address, and company name. Choose a secure password. At this stage, SalesNexus may ask for basic information like your industry or number of employees to tailor your experience.
- Verify Your Email: After submitting the form, check your inbox for a confirmation email from SalesNexus. Click the verification link inside that email to confirm your address and activate the account.
- Log In: Once verified, log in with your new credentials. SalesNexus often starts with a simple setup wizard or dashboard tutorial to orient new users. Follow any on-screen prompts to get started. To reinforce, revisit this SalesNexus tutorial if you need a quick refresher on any step.
- Complete Basic Settings: After logging in, go to the settings or “Company Profile” area. Update your time zone, currency, and business address so that reports and timestamps are accurate for your location.
- Invite Team Members: Under a “Users” or “Team” section in Settings, add any other sales team members who need access. Assign appropriate roles (e.g. Admin, Sales Rep, Marketing) to control permissions. This way, your team can log in and start working right away.
- Explore the Dashboard: Take a moment to navigate the main menu. You should see modules like Contacts, Opportunities (or Pipeline), Email, Automation, and Reports. Understanding where things are will help you follow along with the rest of this SalesNexus tutorial. Whether you’re tech-savvy or a beginner, this SalesNexus tutorial makes the process straightforward.
Following these initial steps will get your SalesNexus account up and running. We have created this SalesNexus tutorial section to show exactly what to click and where, so new users can confidently set up their system.

Importing Contacts Into SalesNexus
A CRM is only useful once you have contacts to work with. In this part of our SalesNexus tutorial, we explain how to bring your existing customer and lead data into the platform. SalesNexus supports multiple import methods, so you can choose the one that fits your needs. We’ll cover importing from spreadsheets, adding contacts manually, and syncing with other tools. No matter where your contacts are coming from, the SalesNexus tutorial approach ensures they end up in your CRM clean and organized. In our SalesNexus tutorial series, we emphasize checking data quality every step of the way.
Importing from Spreadsheets
If you have customer data in a spreadsheet (like Microsoft Excel or Google Sheets), SalesNexus can import it. Start by preparing a CSV file with columns like First Name, Last Name, Email, and Phone. Make sure each column has a clear header label that matches a SalesNexus field (for example, label it “Email” for email addresses).
To import:
1. Upload your file: Go to the Contacts section in SalesNexus and click the Import button.
2. Select your spreadsheet: Choose the CSV file you prepared and upload it.
3. Map fields: In the import wizard, match your spreadsheet columns to SalesNexus fields. Ensure key fields like email address align correctly.
4. Assign tags or groups: Apply any segmentation tags (like “Prospect” or “Imported2026”) during the import to organize these contacts on arrival.
5. Review and import: Check the preview to fix any errors (such as duplicates or missing data) before finalizing the import. In this SalesNexus tutorial on importing, you’ll see exactly where to click and what to map.
When the import completes, those contacts will populate your CRM. You can then filter and segment them, or immediately add them to campaigns and pipelines.
Manual Contact Entry
For smaller lists or one-off entries, add contacts manually. This is useful when you meet a new prospect or want to log a lead on the fly:
– In SalesNexus, click the Contacts menu and choose “Add Contact” or “New Contact”.
– Fill in the contact form fields: name, email, phone, company, etc.
– Save the new contact.
Now the contact exists in SalesNexus. You can open its record to add notes, schedule follow-ups, or assign the contact to a team member. In this SalesNexus tutorial, think of manual entry as a quick, real-time way to capture one lead at a time.
Syncing Tools and Integrations
SalesNexus can connect with other tools to streamline data entry. For instance:
– Email Sync: Link your Gmail or Outlook so incoming leads (and your email history with them) automatically appear in SalesNexus.
– Calendar Sync: Integrate Google Calendar or Outlook Calendar to capture events and meetings with contacts.
– Integration Apps: Use built-in integrations or the SalesNexus API to sync data from QuickBooks, LinkedIn, or other lead generation systems.
To set up syncs, go to the Settings or Integrations area of SalesNexus and follow prompts to connect your accounts (usually by authorizing or entering API keys). Once connected, new leads and contacts can flow into SalesNexus automatically. Be sure to test each integration to make sure data is transferring correctly.
Regardless of which method you use, keep your data clean: use consistent naming, remove duplicate entries, and apply tags or categories for easy filtering. The SalesNexus tutorial approach emphasizes proper field mapping and tagging so you can segment your contacts into lists like “Customers”, “Cold Leads”, or “Newsletter Subscribers”, keeping your CRM organized.
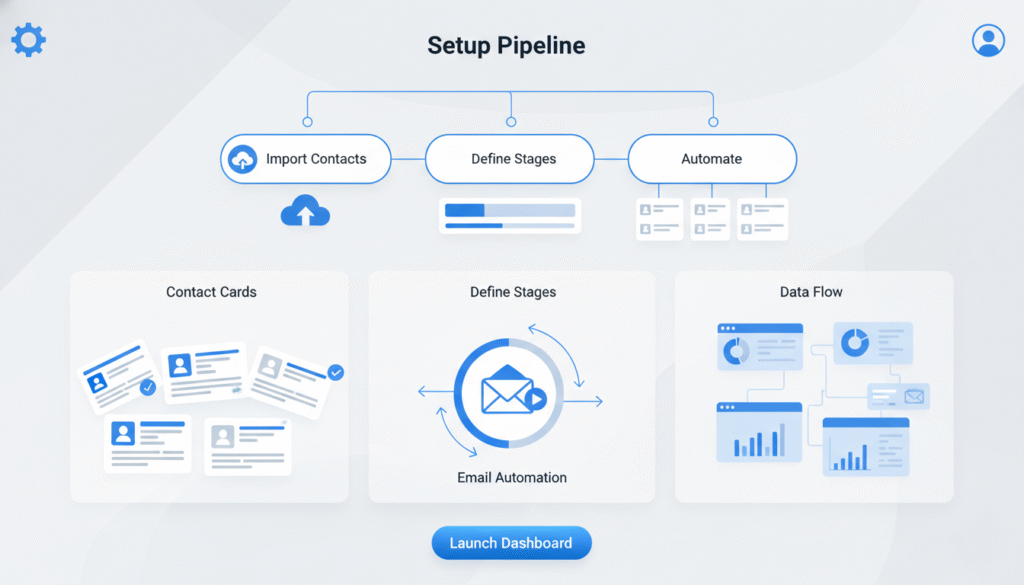
Building Your Sales Pipeline in SalesNexus
A visual sales pipeline helps you track deals through each stage of your sales process. In this SalesNexus tutorial section, we’ll show you how to create and customize your pipeline so your team always knows the status of each opportunity. A properly defined pipeline turns guesswork into clear actions. For example, this SalesNexus tutorial section includes an example pipeline layout that many beginners use.
Defining Sales Stages
First, outline your sales stages. Common stages include things like New Lead, Contacted, Qualified, Proposal Sent, Negotiation, and Closed (Won/Lost). In SalesNexus, you can usually customize these stages in Settings or the Pipeline setup area. For each stage:
– Give it a clear name and description so your team knows when a deal moves from one stage to the next.
– Order the stages from first contact to closing the sale.
For example, many teams use 5-7 stages. Take a moment to map out your process: if you offer demos or quotes, make sure stages like “Demo Scheduled” or “Negotiation” exist. Updating these stages in SalesNexus means every sales rep will see the same pipeline structure. For clarity in this SalesNexus tutorial, treat your first pipeline as a template that can evolve as you learn.
Creating a Pipeline View
Once you have defined stages, set up the pipeline view:
1. Open the Pipeline or Deals section of SalesNexus.
2. If needed, create a new pipeline and name it (e.g. “Main Sales Pipeline”). Some CRMs allow multiple pipelines for different products.
3. Add your stages into the pipeline in order. Most systems let you drag and drop stages or enter them in sequence.
4. Add deals (opportunities) by clicking an “Add Deal” or “New Opportunity” button. Assign each deal to the correct stage and give it a name (often the prospect’s name or company).
Now you should see a board or table view with columns for each stage. Each deal appears as a card that can be dragged from one column to another as it progresses. This visual pipeline is very practical: sales reps can update deal stages with a quick drag-and-drop, and managers can see which deals need attention.
👉 Want to build your first SalesNexus pipeline? Click here to get started with your SalesNexus account.
Assigning Leads to Team Members
SalesNexus lets you assign each contact or deal to a team member, so responsibilities are clear. To assign leads:
– Edit the contact or deal record and select the Owner or Assigned To field, choosing a team member’s name.
– Or, bulk-assign many leads at once from the Contacts list by selecting multiple records and choosing an assignment action.
This way, each salesperson owns their leads. In our SalesNexus tutorial example, a manager might assign new leads to reps automatically or based on territory. By assigning leads, you also unlock performance tracking. SalesNexus can then break down the pipeline by rep, so you can see who is closing deals and who may need help.
Lead Scoring Basics
Lead scoring helps your team prioritize follow-ups. SalesNexus may let you automate scoring based on actions, or you can manually score leads with tags. For example:
– Give 10 points if a lead opens an email from your campaign.
– Add 20 points if they click a link or visit your website.
– Assign more points if they schedule a meeting or respond to your outreach.
In practical terms, create a custom field or tag for “Hot Lead” when a lead’s score exceeds a threshold. This SalesNexus tutorial step emphasizes that scoring turns a long list of contacts into a prioritized list. High-scoring leads rise to the top of your list, ensuring your team focuses on the most engaged prospects first.
Email Automation Setup (SalesNexus Tutorial)
One of SalesNexus’s standout features is built-in email automation. In this SalesNexus tutorial section, we dive into setting up email campaigns, sequences, and automated follow-ups. Automating your email outreach saves time and ensures that no lead is forgotten. For clarity, this SalesNexus tutorial includes example email content to follow. By the end of this section, you’ll be able to build email drip sequences, create rules to follow up automatically, and track the results of your campaigns.
Creating Email Sequences
SalesNexus lets you create “email sequences” (sometimes called drip campaigns) that send multiple emails over time. To create a sequence:
1. Navigate to the Email or Sequences section: In the SalesNexus main menu, click on “Email” (or it might be labeled “Automation” or “Sequences”).
2. Create a new sequence: Click “Create Sequence” (or a + button). Give it a name like “New Lead Nurture”.
3. Add your first email: Compose the subject line and body for the first message. Use merge tags (like [FirstName]) to personalize. The SalesNexus tutorial approach is to write a friendly introduction addressing the contact by name.
4. Set the send timing: Choose when the first email should go out (immediately or after a few hours/days).
5. Add follow-up emails: Click “Add Step” to include a second email. Enter the content for Email #2 (for example, a follow-up reminder) and set a delay (e.g., send 3 days after the first). Continue adding steps for any additional follow-ups, each with its content and delay.
6. Activate the sequence: Save your work and turn on the sequence.
For example, a simple SalesNexus tutorial sequence might be:
– Email 1: A brief welcome or introduction. (Sent immediately.)
– Email 2: A helpful tip or resource. (Sent 3 days later if no reply.)
– Email 3: A reminder with a special offer. (Sent 5 days after the first if still no reply.)
Once your sequence is active, add contacts to it. You can do this manually (select leads and add them to a sequence) or automatically using an automation trigger (covered next). For instance, in this SalesNexus tutorial, we provide sample subject lines and body text.
Automating Follow-Ups
The beauty of email sequences is that SalesNexus handles the follow-ups for you. For example:
– If a contact doesn’t reply to the first email, SalesNexus automatically sends the second email at the scheduled time.
– If a contact replies or books a meeting, you can set the sequence to stop any further emails (so they don’t get annoyed).
This is the heart of a SalesNexus tutorial on automation: the system remembers follow-ups for you. You never have to manually track who needs the next email. Typically, you can set these rules when building the sequence (look for options like “Stop on reply” or “Remove on conversion”).
Trigger-Based Automations
Beyond scheduled sequences, SalesNexus lets you trigger emails or actions based on contact behavior:
– On Signup: When a lead fills out a form on your website, automatically add them to a welcome email sequence.
– Tag triggers: If you tag a lead as “Qualified,” automatically start a product demo email.
– Email activity: If a prospect clicks a link in any email, automatically move them to a “Hot Leads” list and notify the sales rep.
To set triggers, go to the Automation or Workflows area in SalesNexus. Create a new rule and define the condition (e.g., “Contact enters List X” or “Custom Field = Value”) and the action (e.g., “Add to Sequence Y” or “Send Email Z”). This way, if a contact meets the condition, SalesNexus automatically performs the action. Using trigger-based automations in this SalesNexus tutorial, you can ensure the right message goes to the right people at the right time, without extra manual work.
Tracking Performance Metrics
After your email sequences are sending, measure their success with SalesNexus’s analytics:
– Open rates: What percentage of recipients opened your email? Improve subject lines if this is low.
– Click rates: How many clicked on your links? This gauges engagement.
– Reply rates: If replies are tracked, see how many contacts responded to your outreach.
– Unsubscribe and bounce rates: A high rate here may mean your list needs cleaning.
Open the Email Reports or Campaign Dashboard in SalesNexus to see these stats. A key part of this SalesNexus tutorial is reviewing performance regularly. For example, check weekly if your follow-up emails are getting better responses than the initial email. If not, adjust the content or timing. Use charts and graphs to spot trends. Over time, refining your sequences based on these metrics will improve your overall outreach success. This iterative approach is emphasized throughout this SalesNexus tutorial.
By building sequences, automating follow-ups, and tracking metrics as shown in this SalesNexus tutorial, you create a self-running email system that continually optimizes itself. This hands-free approach lets your small team focus on the hottest leads.

Tracking Deals & Measuring CRM Performance (SalesNexus Tutorial)
Once your pipeline is active and you have deals in motion, SalesNexus provides tools to track performance and measure success. In this SalesNexus tutorial section, we go over the main features: deal cards, pipelines, reports, analytics, activity logs, and KPIs. Using these tools helps you see which deals are progressing, where bottlenecks are, and how your sales team is performing overall. For example, this SalesNexus tutorial includes a sample dashboard with key metrics.
- Deal Cards: In SalesNexus, each sales opportunity is represented by a deal card (or opportunity record). Click a deal to open it. You can enter details like deal value, expected close date, related contacts, and notes. This card is the central place to manage the sale. Update the stage as progress is made, and assign follow-up tasks or reminders directly on the card.
- Pipeline View: Your custom pipeline (created earlier) shows all deal cards organized by stage. You can drag a deal card from one column to the next as it advances. This visual board lets you see, at a glance, how many deals are in each stage and their total estimated value. It quickly highlights bottlenecks (if too many cards pile up in one stage).
- Reports and Analytics: SalesNexus includes built-in reports for analyzing your pipeline and sales results. For example, view reports for Total Revenue This Month, Conversion Rates by Stage, Deals Won vs Lost, and Average Deal Size. Look at charts to spot trends, like whether sales are growing or if certain stages are taking too long. You can often export these reports or set them to email you updates.
- Activity Logs: Every call, email, or meeting you log in SalesNexus is attached to a contact or deal. The Activity Log shows this history. Reviewing activity per deal helps you ensure no leads fall through the cracks and that your reps follow up regularly. It’s also a KPI: how many calls or emails were made this week, how many meetings scheduled, etc. SalesNexus typically allows you to log interactions manually or automatically record emails sent from the system.
- Key Performance Indicators (KPIs): Identify and track your most important sales metrics. Common KPIs include number of new leads added, deals closed (won), win rate, and pipeline value. For example, a KPI might be “10 deals won per month” or “$50,000 in new revenue monthly.” Use the dashboards in SalesNexus to display these KPIs. This SalesNexus tutorial recommends setting a goal line or target on your charts to measure against.
Regularly review these metrics. For instance, at the end of each week, check which deals moved forward, and where deals were lost. The SalesNexus tutorial approach is to use these insights in a weekly sales meeting: adjust your process if you see a stage where leads stagnate, or follow up on high-value leads that haven’t converted yet. The SalesNexus tutorial also suggests scheduling weekly reviews of these reports. By consistently tracking deals and analyzing performance, you’ll get the most out of your SalesNexus CRM setup and drive better sales outcomes.
Best Practices for New CRM Users
Now that your SalesNexus CRM is set up, follow these best practices to get the most value from the system. These habits and routines come from experienced CRM consultants and are especially helpful for new users:
- Daily Lead Review: Each day, check your assigned leads or deals. Update the status on each contact you spoke with or emailed. Make a note of any action needed (for example, send a proposal or make a call). In the SalesNexus tutorial way of working, scheduling a few minutes each morning to review the CRM ensures no hot lead is forgotten.
- Clean Data Rules: Keep your data accurate and organized. Remove duplicate contact records and archive outdated entries. Use consistent formatting (e.g., always list company names the same way). This makes searches, filters, and reports work correctly, and ensures automation emails don’t misfire on bad addresses.
- Automation Hygiene: Periodically review your email sequences and triggers. Make sure the content is up to date and that links in templates still work. Check that triggers are firing as expected. Remove any contacts from sequences who shouldn’t be there (for instance, those who have opted out). In this SalesNexus tutorial, think of automation hygiene like maintaining a machine: it needs occasional tune-ups to keep running smoothly. Follow the tips in this SalesNexus tutorial to maintain a healthy system.
- Pipeline Discipline: Train your team to move each deal through the pipeline stages promptly. If a lead is contacted, move it from “New Lead” to “Contacted.” If a deal closes, set it to “Won” or “Lost” and record the outcome. Disciplined pipeline management gives you real-time forecasting and prevents leads from getting “stuck” with no follow-up.
- Weekly Tracking: Set aside time every week (for you or the whole team) to examine performance. Look at pipeline reports and KPIs in SalesNexus. Compare against your goals or last week’s numbers. Celebrate wins and strategize on stalled deals. For example, if dashboard charts show this month’s won deals are below target, you might decide to run a follow-up campaign on your best leads.
- Strategic Usage: Use SalesNexus intentionally, aligning it with your sales strategy. Tag contacts with campaign names or lead sources so you know which marketing efforts work. Customize fields or reports to track the data most important to your business (for example, industry or product interest). The more you tailor SalesNexus to your needs, the more powerful and strategic the tool becomes. For example, our SalesNexus tutorial emphasizes planning weekly sales meetings to review CRM updates.
By following these new-user best practices, you turn SalesNexus from a passive database into a disciplined sales engine. Consistency is key: the more regularly you use the CRM according to this SalesNexus tutorial, the faster you will see growth and smoother sales operations.
SalesNexus Tutorial Summary & Final Recommendations
You have now completed this SalesNexus tutorial on how to set up and use SalesNexus CRM. We began with creating your account and setting up basic settings, and progressed through importing your contacts into the system. We built a customized sales pipeline with clear stages and assigned leads to team members. We set up powerful email automation by creating sequences and follow-up triggers. We looked at how to track deals, run reports, and monitor key performance metrics. In each step of this SalesNexus tutorial, we emphasized practical, actionable guidance. For continuity, you can revisit any section of this SalesNexus tutorial as needed.
At this point, you should feel comfortable navigating the SalesNexus interface and using it for day-to-day sales tasks. Remember that practice and consistency make a CRM effective. If you want a simple, powerful CRM, SalesNexus is a great place to start. As this SalesNexus tutorial highlights, SalesNexus has a user-friendly interface and powerful automation. By following this SalesNexus tutorial, you’ve learned how to get your SalesNexus system running smoothly.
To recap, here are the core steps covered in this SalesNexus tutorial:
1. Account Setup: Sign up, verify your email, and configure your company settings.
2. Import Contacts: Bring in existing leads from spreadsheets or other tools, making sure to map fields and tag contacts for segmentation.
3. Build the Pipeline: Define your sales stages in SalesNexus, create a pipeline board, and add deals. Assign each lead to the right team member.
4. Automate Email Outreach: Create email sequences and triggers so follow-ups happen automatically. Monitor email opens, clicks, and replies through reports.
5. Track and Measure: Use deal cards, pipeline views, reports, and dashboards to track progress. Log activity and keep data clean to ensure accurate analytics.
6. Apply Best Practices: Review your leads daily, keep data clean, and maintain your automations. Consistently use the CRM for forecasting and strategy.
This SalesNexus tutorial shows exactly how to get your system running smoothly. With these tools and practices in place, your sales team is empowered to work more efficiently.
If you are a small business owner or sales manager new to CRM, start applying what you’ve learned today. Dive into the system, import a test contact, and explore the features with the guidance of this SalesNexus tutorial. Use SalesNexus for your next sales campaign and watch as it simplifies your workflow. The steps and examples in this SalesNexus tutorial have armed you with everything needed to succeed, and now it’s up to you to put them into action. Remember, this SalesNexus tutorial is here to guide you every step of the way. Good luck building your sales process with SalesNexus, and remember that each step you take is a step towards smoother, more organized selling!
👉 Begin your SalesNexus journey now — click here to create your account and apply everything in this SalesNexus tutorial.
This article is based on industry knowledge and professional experience, without listing external sources.
Want to read more about SalesNexus? SalesNexus review